
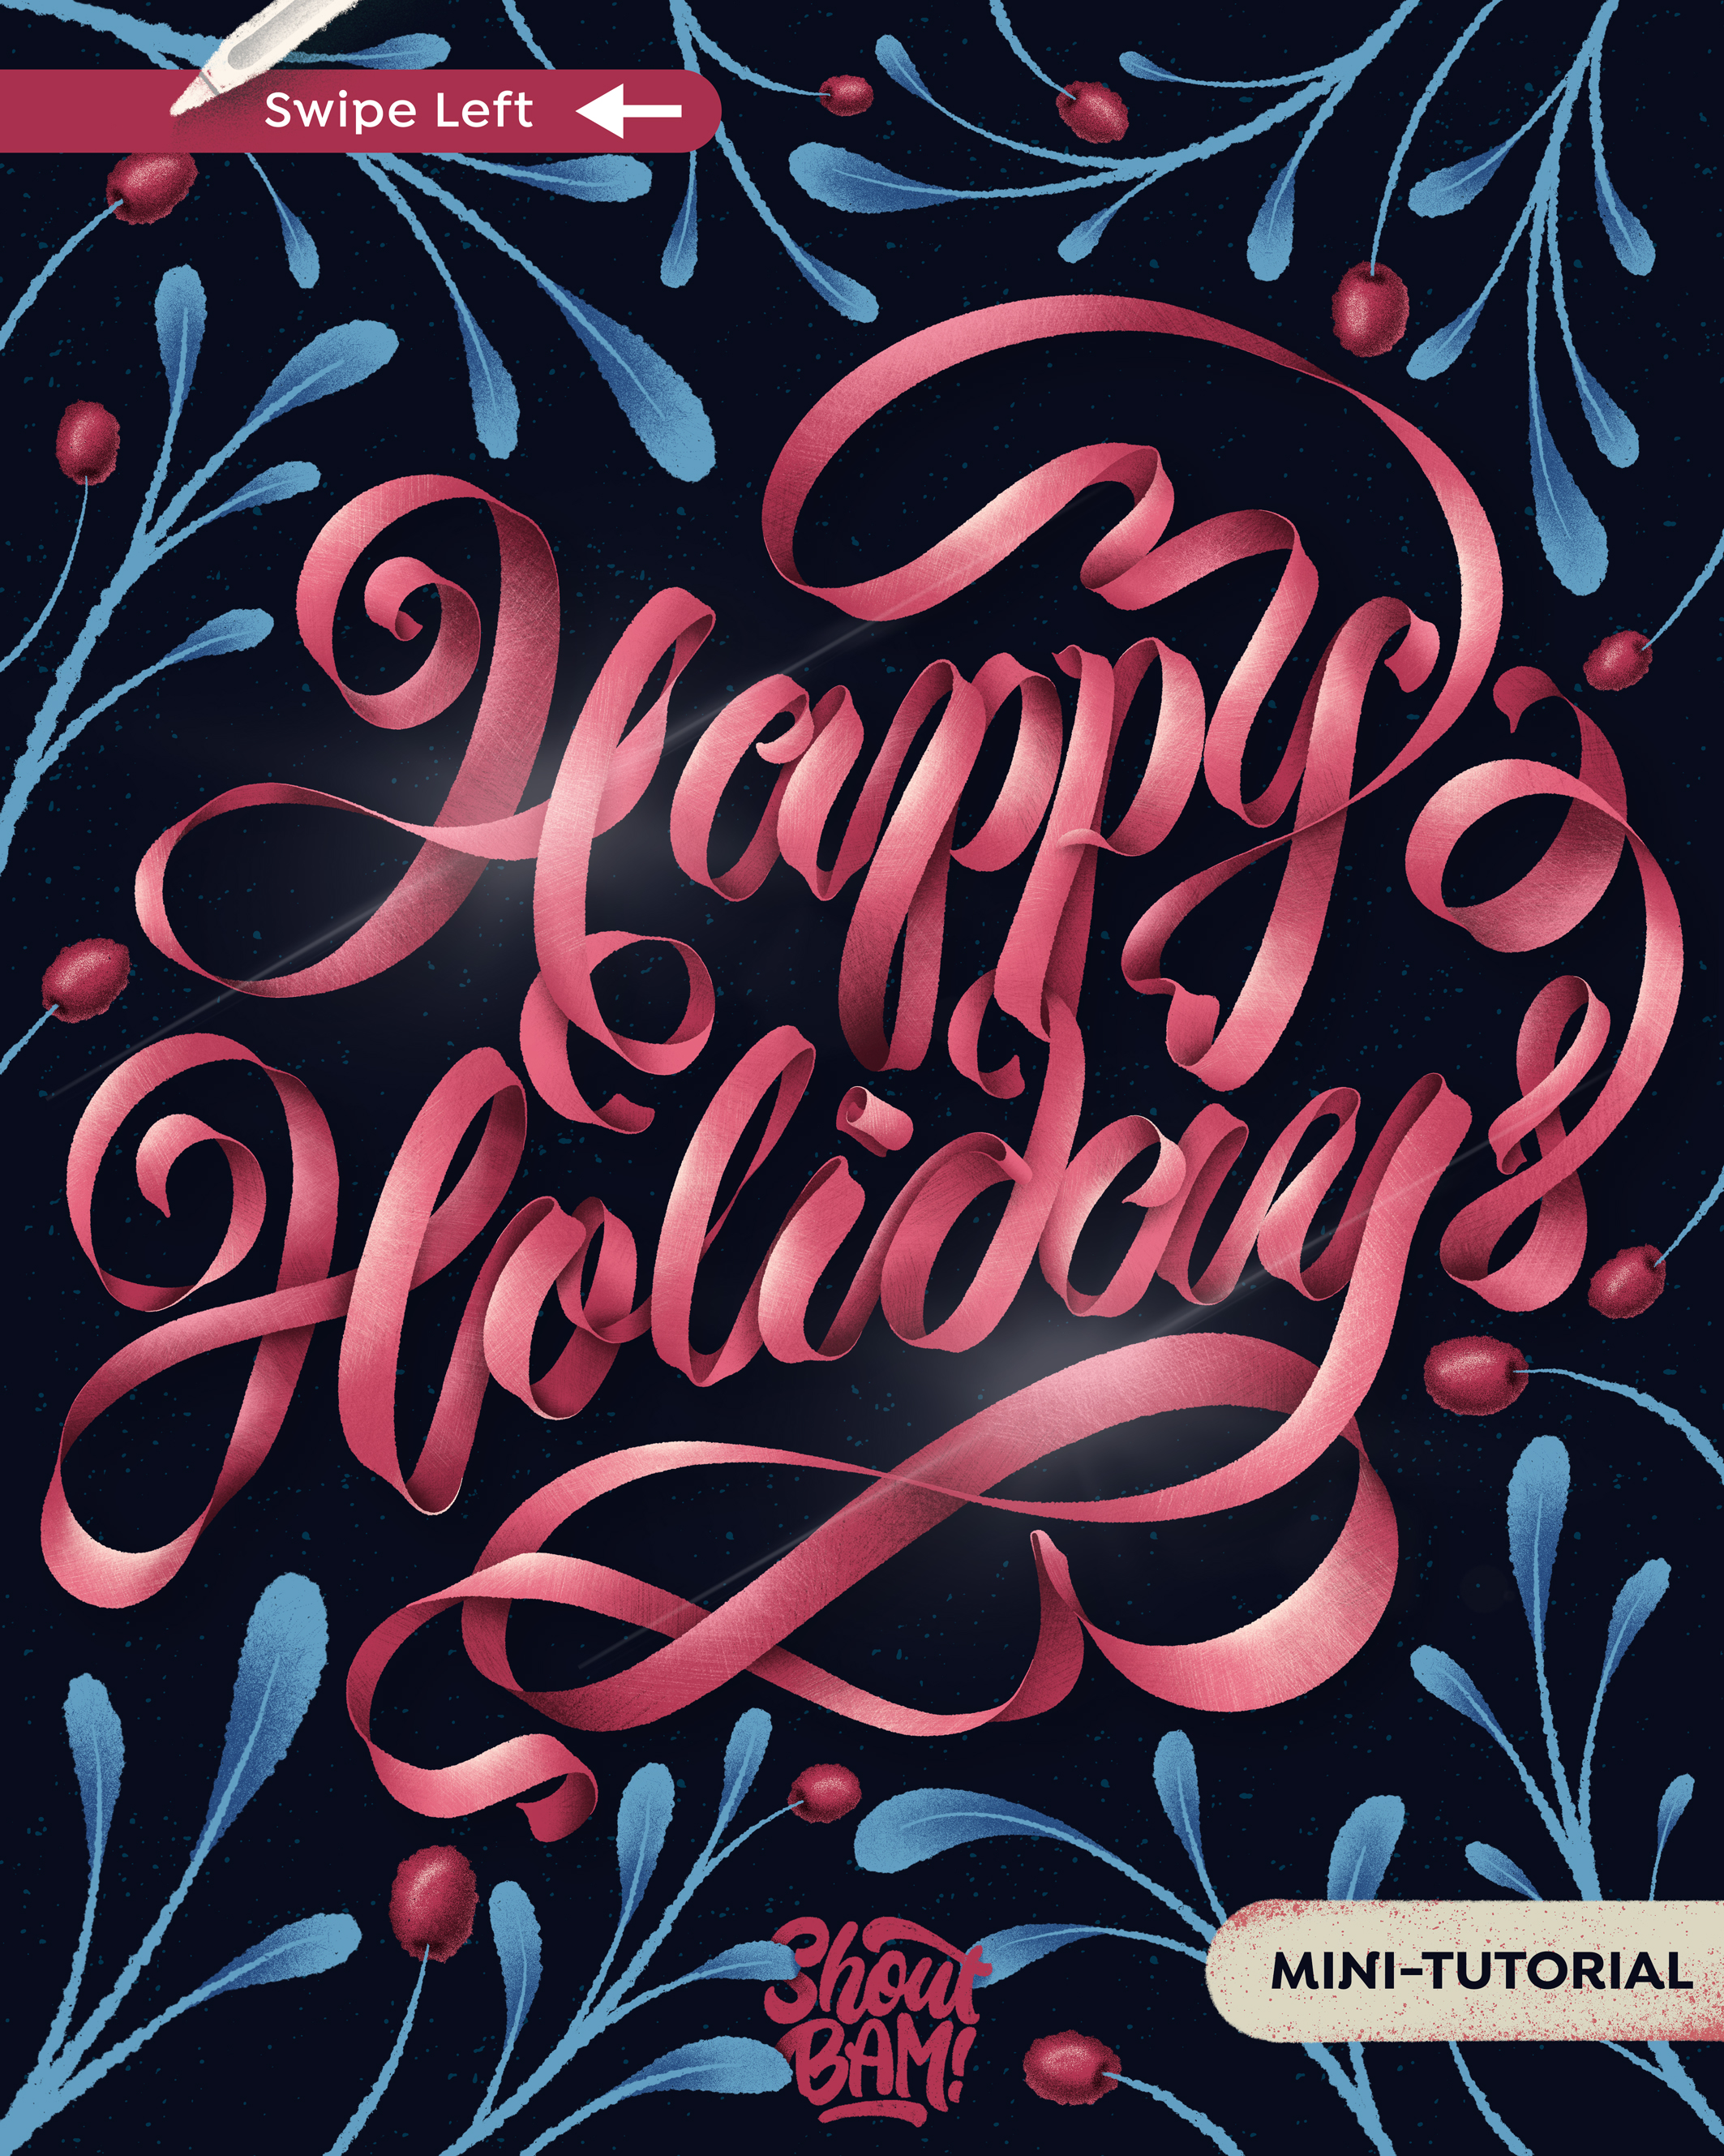
A mini - tutorial on how to make a ribbon lettering!
Date: March 05th 2020.
Est Read Time: 7 min
Hola everyone!
Here we come again with the new blog tutorial! So fast right? We know, we are shocked as well, but the sun has hit us on the right spot today and we just felt like writing a new tutorial!
Today we will write about how to make a ribbon lettering! We are aware that the holidays have passed but hey, it's always a good time to learn something new, no?
So let's start!
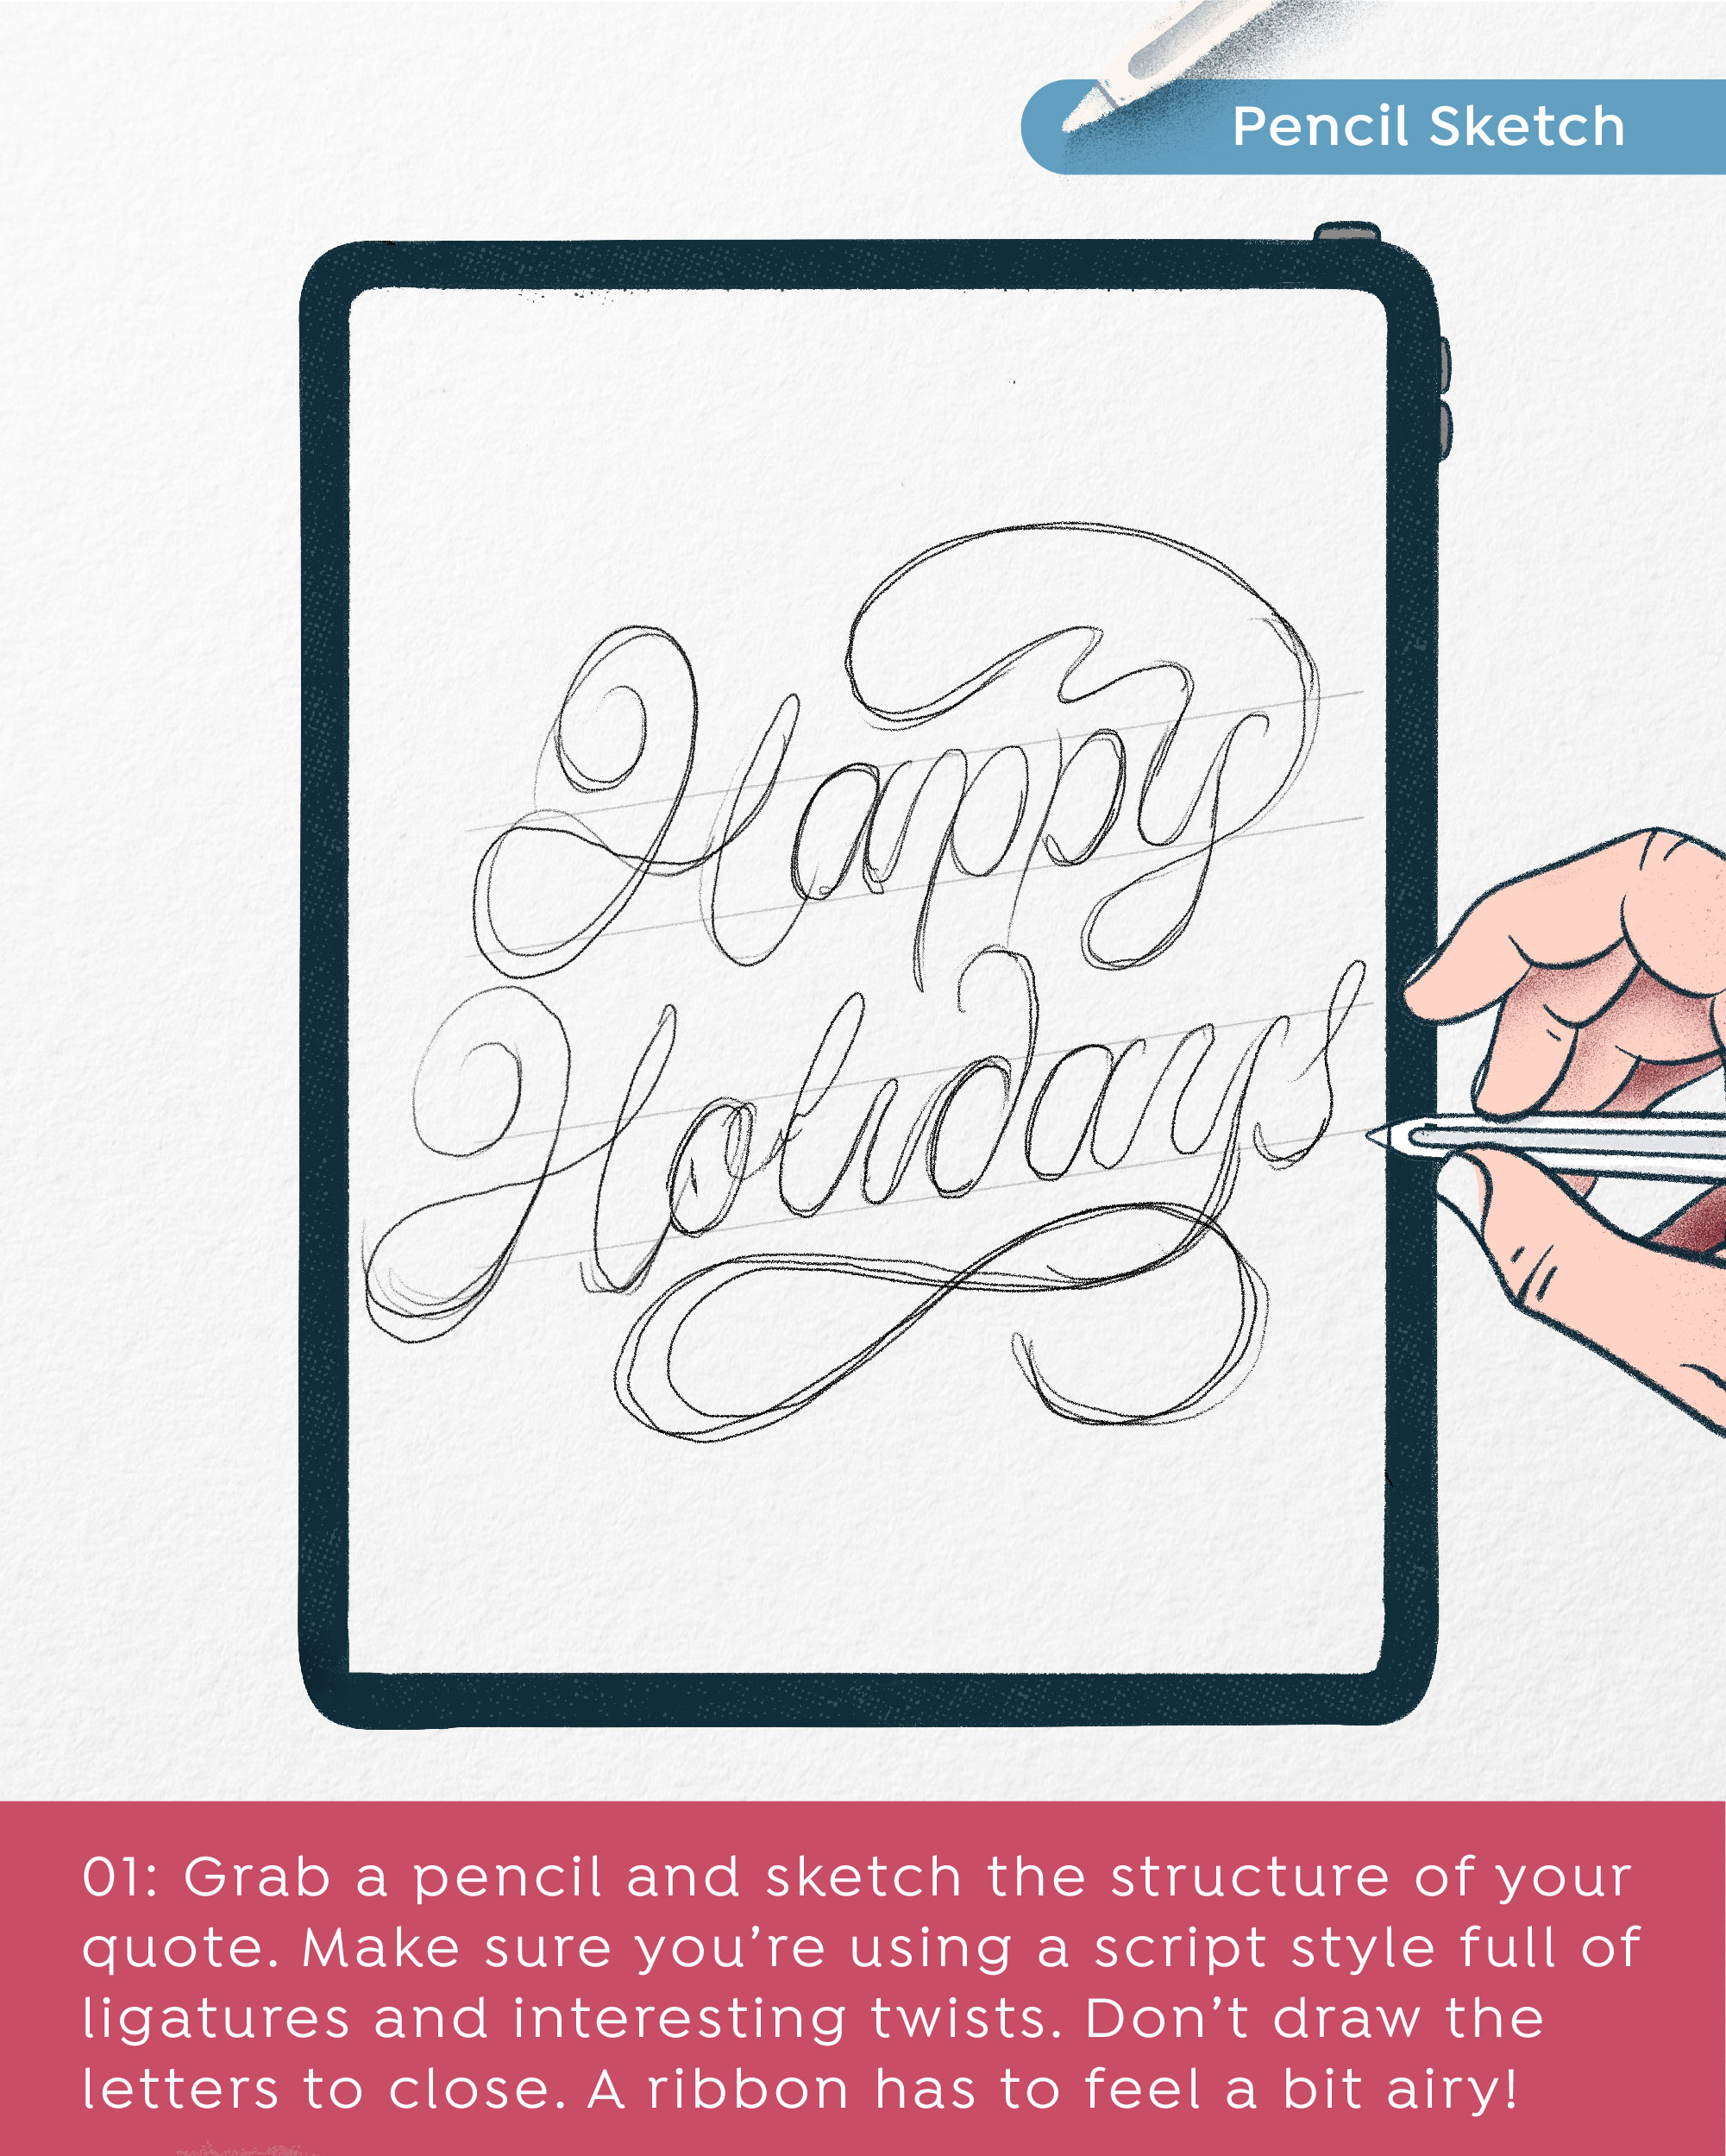
STEP 1:
What will you need to create this lettering?
- iPad Pro
- Procreate Software
- Our handmade Ribbon Brush
You can download this brush in our treasury section if you subscribe to our newsletter ;)
To get started grab a pencil brush and sketch the structure of your quote. Make sure you are using a script style full of ligatures and interesting twists.
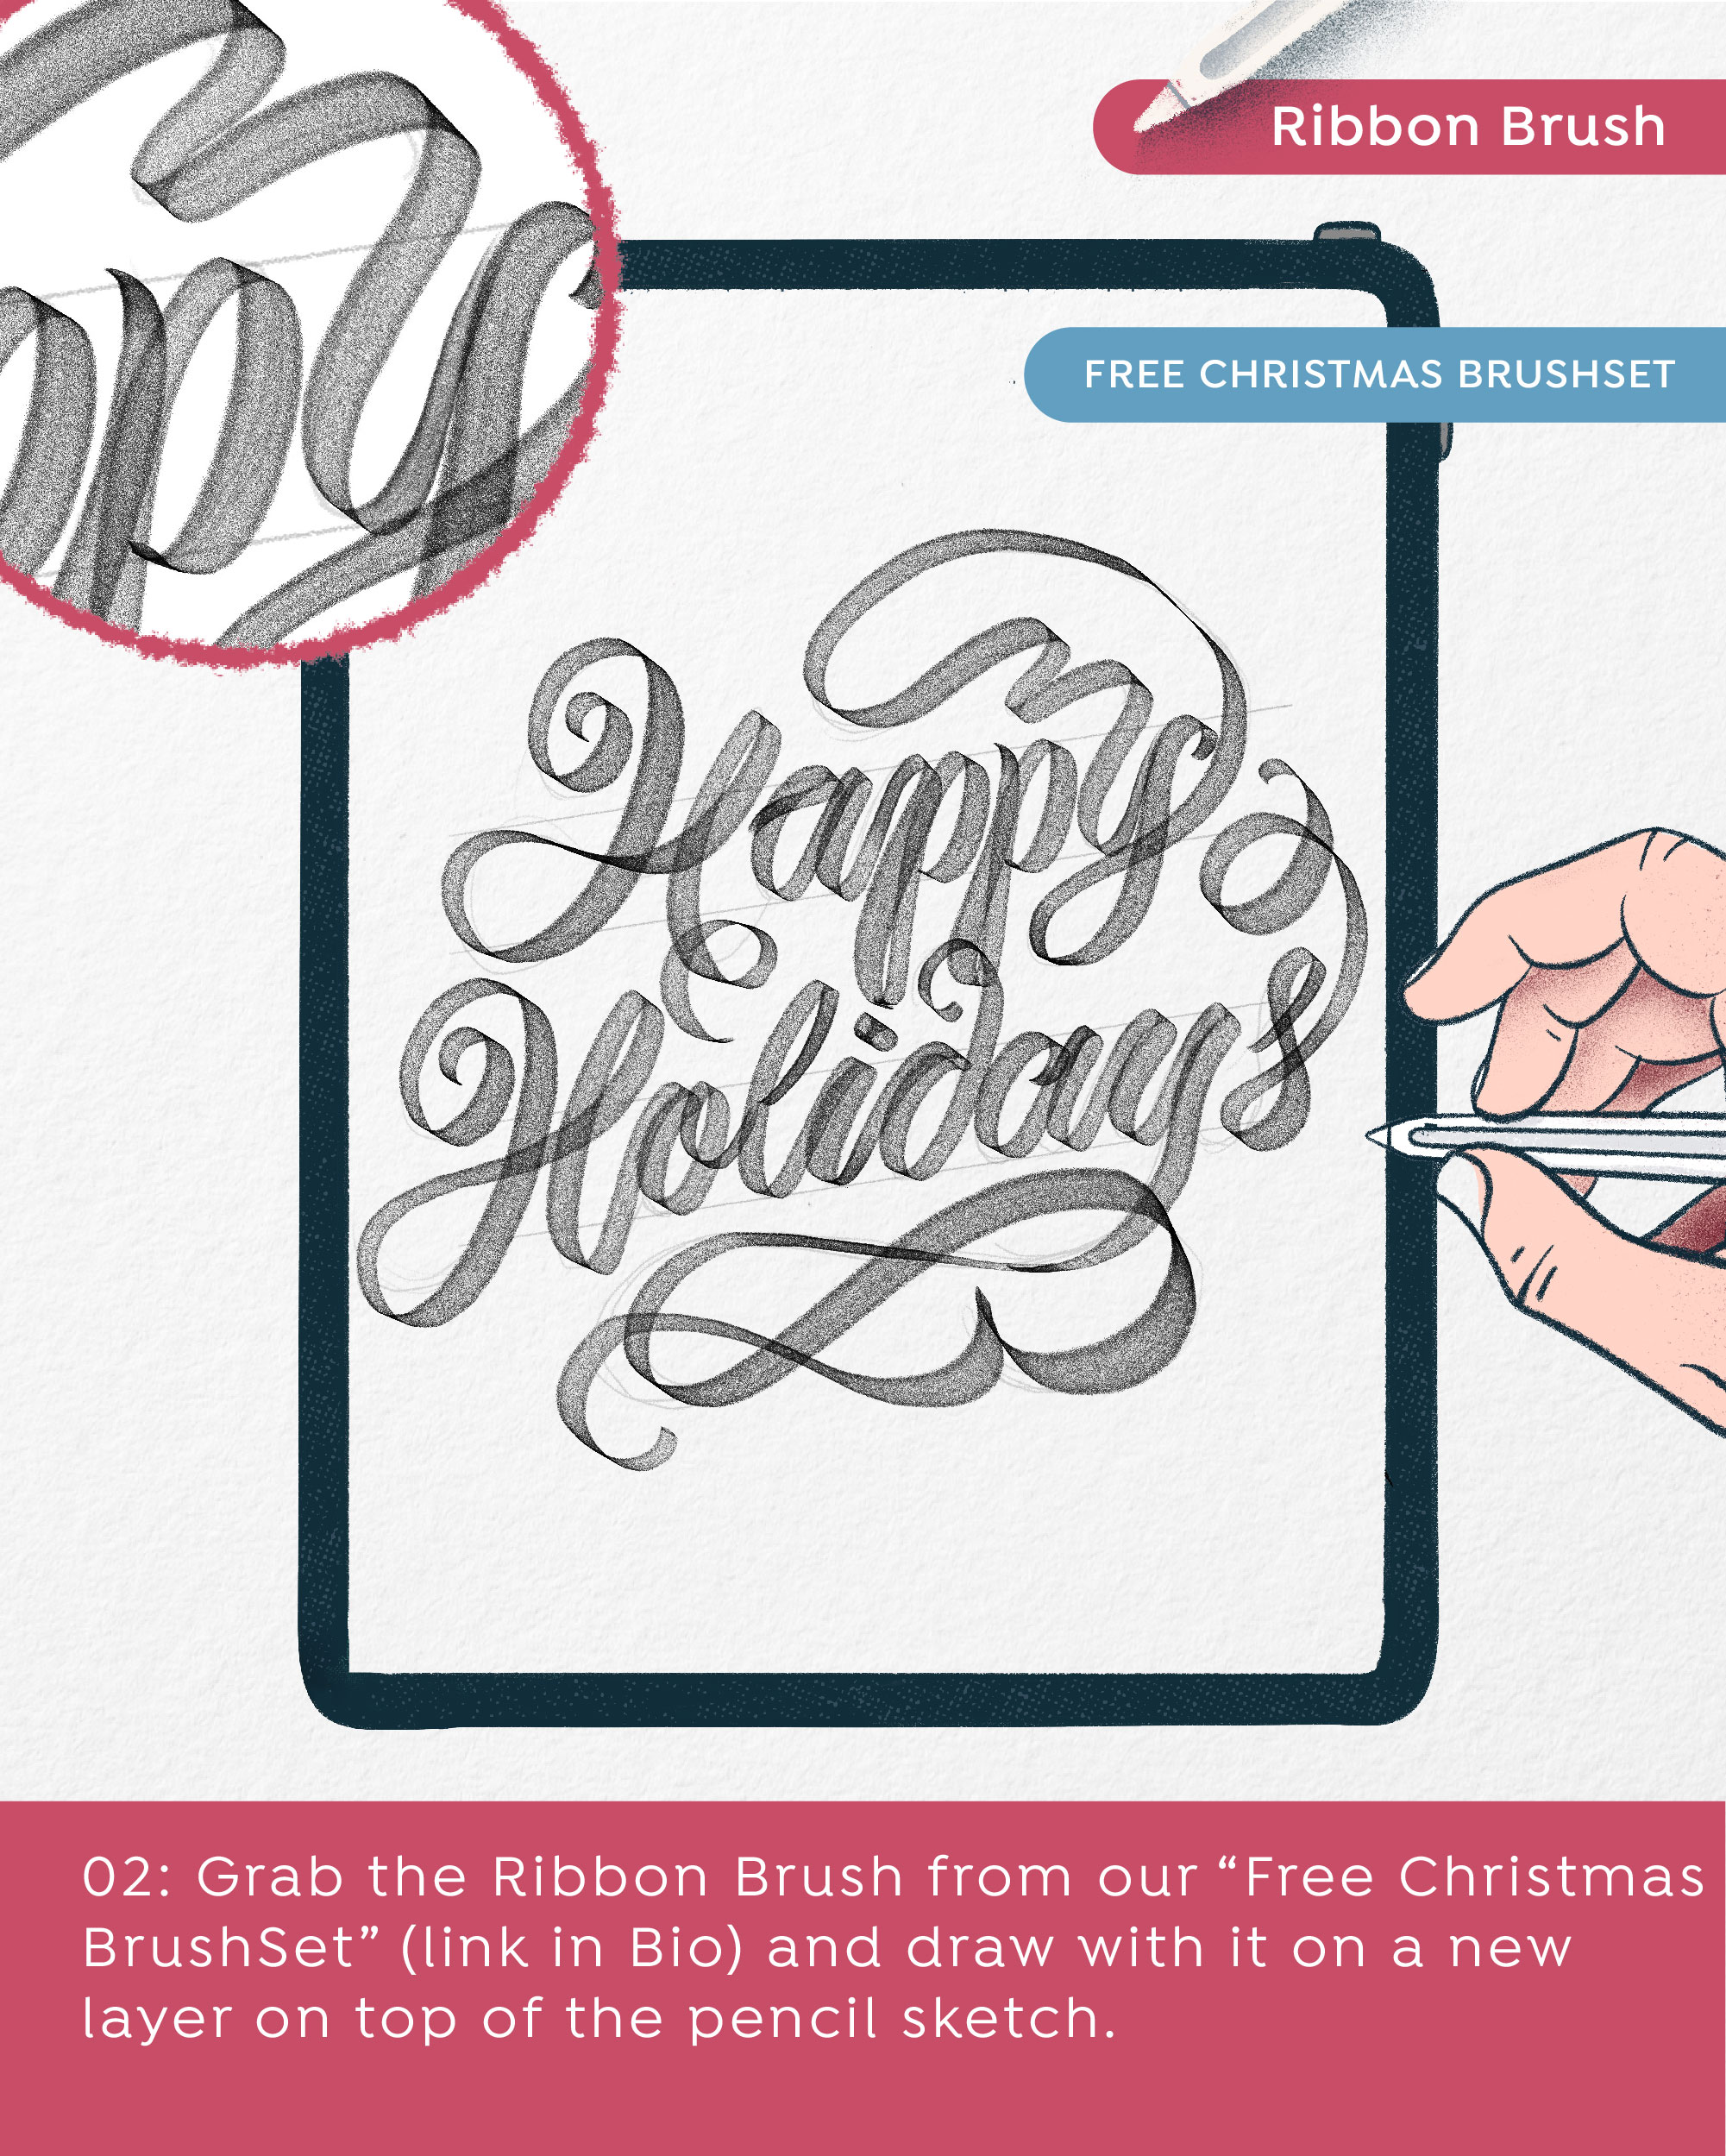
STEP 2:
After you made the structure that you feel sensationally happy about, it's time to grab the Ribbon Brush and redraw the letters. Don't forget to do it in a separate layer so you don't mix it with the sketch. While doing it, make sure you take care of the ribbon folds so it looks as realistic as possible. Also, you can play and add some quirky swashes and give some nice character to the ribbon.
And most importantly, don't forget to have fun and enjoy the process! :D
STEP 3:
Now that you made this ultra crisp ribbon sketch, we are going to ink it! Grab a pencil or an inking brush and outline the ribbon's structure (as always, don't forget to use another layer). In this part, decide which parts will go in front and which will go behind, so let yourself loose with this part. Remember, it doesn't have to be perfect. If you woke up feeling a bit naughty today break some rules and create a weird folding ribbon, we appreciate the originality! And if you feel like playing by the rules, you can always grab a real ribbon and study the way it folds for extra accuracy.

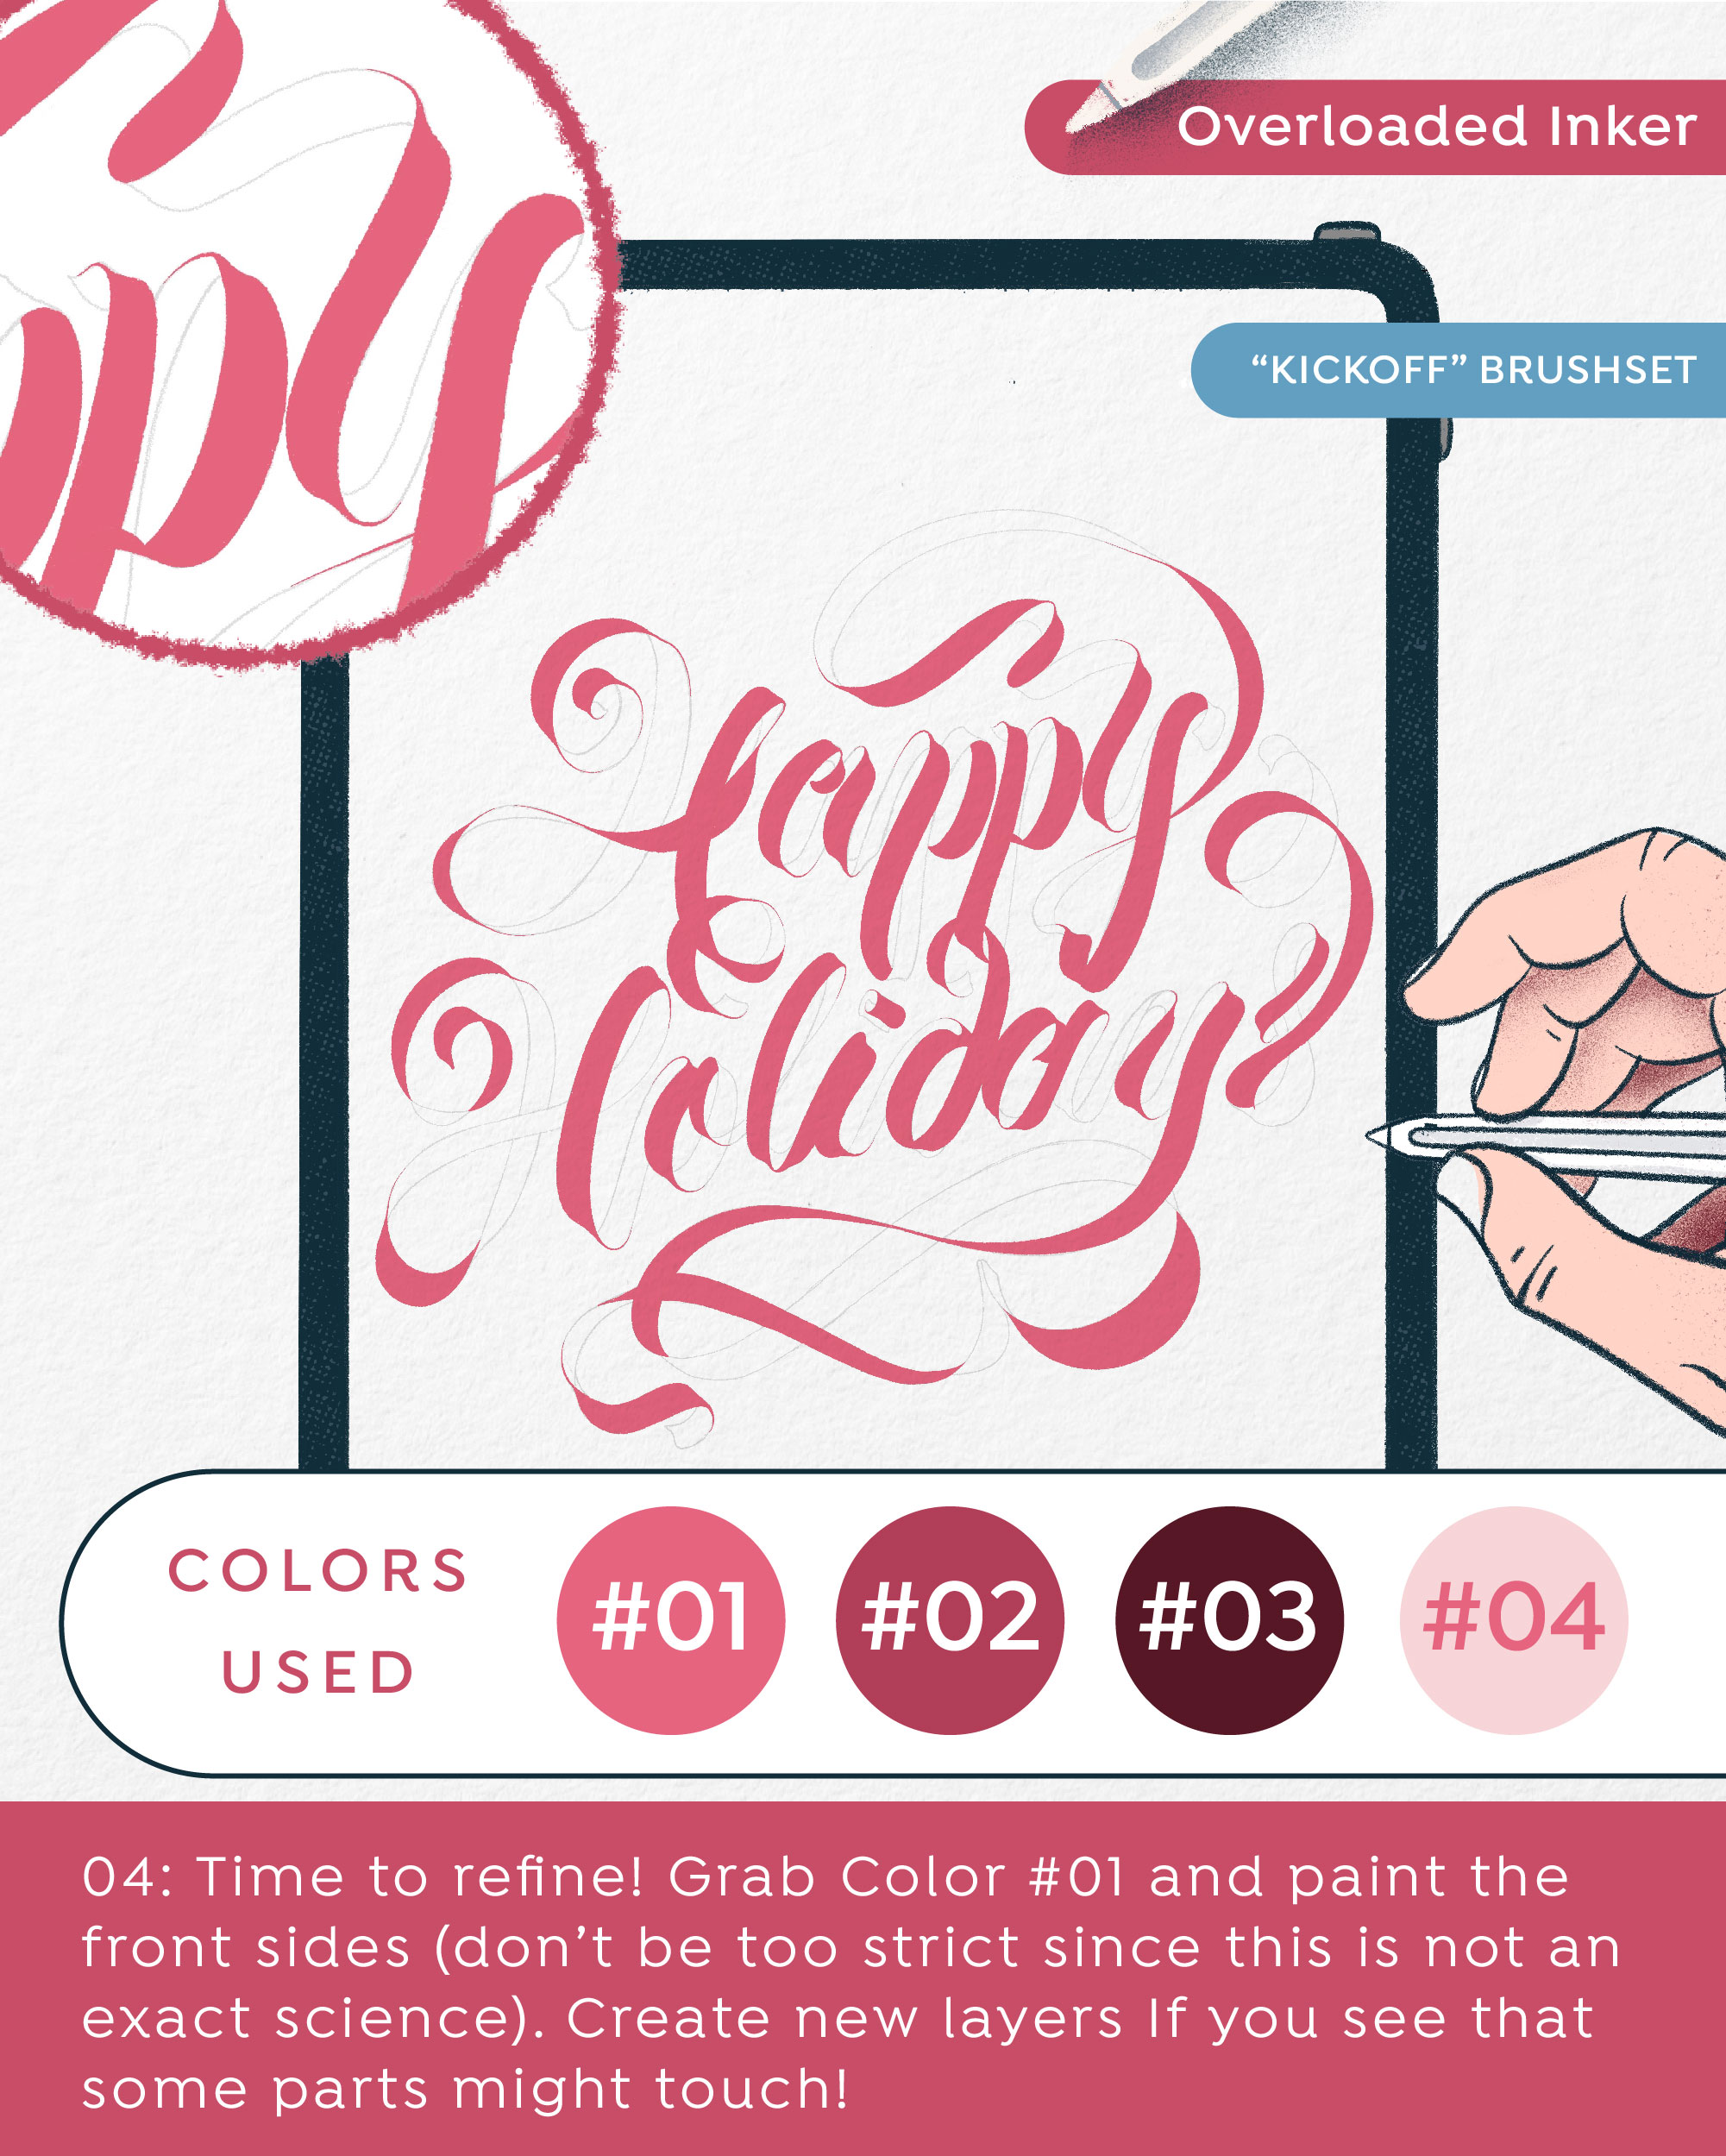
STEP 4:
It's time for refining! In this part we prepared a little colour palette so you don't have to spend your time researching which colours to use, but as always, you can experiment on your own :D So, if you chose to use the prepared palette, grab colour #01 and paint the front sides of the ribbon and don't worry, you don't have to be too strict while doing it. If you see some parts you are colouring that might touch each other, create a new layer to avoid the mess after. We are sure you are nailing it! :D
STEP 5:
After you did the front side, you can probably now see your ribbon getting a nice shape. Now we are going to add a bit of depth to it. So grab the colour #02 (or any other colour that you chose that is a bit darker than the one you used on the front side) and paint the rest of the illustration (the white, outlined parts). Oh yes, and don't forget to create a new layer! We know we are a bit boring with this "creating layer" reminder but it is indeed very important if you don't want to be kicking your head against the wall after (yes, happened to us a few times, it's similar to the feeling of software crashing and you realising you didn't click save for quite some time) and we really don't want that. Let's not talk about it more. How is it going? Looking great already, am I right?

STEP 6:
Oh and now comes the exciting part - shading! Let's make this ribbon magical :D Firstly, create a new layer on top of the layer with colour #02 and make a Clipping Mask. That is going to allow you to paint only inside the shape of the layer that is below (in this case layer with colour #02). Now grab the Selection Tool and select different parts that you want to paint at the moment. Then take a Shader Brush or any other shading brush you adore and add some shadows on the selected parts. As you might assume, the parts that are folding or curving will need to be more dark because the front side should be creating a shadow on them. Follow this example on all of the folding/curving parts.
Is it spectacular? I bet it is :D

STEP 7:
And now repeat! Make a Clipping Mask over the layer with colour #01 and paint the shadows following the same principle with the colour #02. Sweet, no?
Now you can already see the ribbon getting more realistic and the colours fading into each other creating a smooth transition.

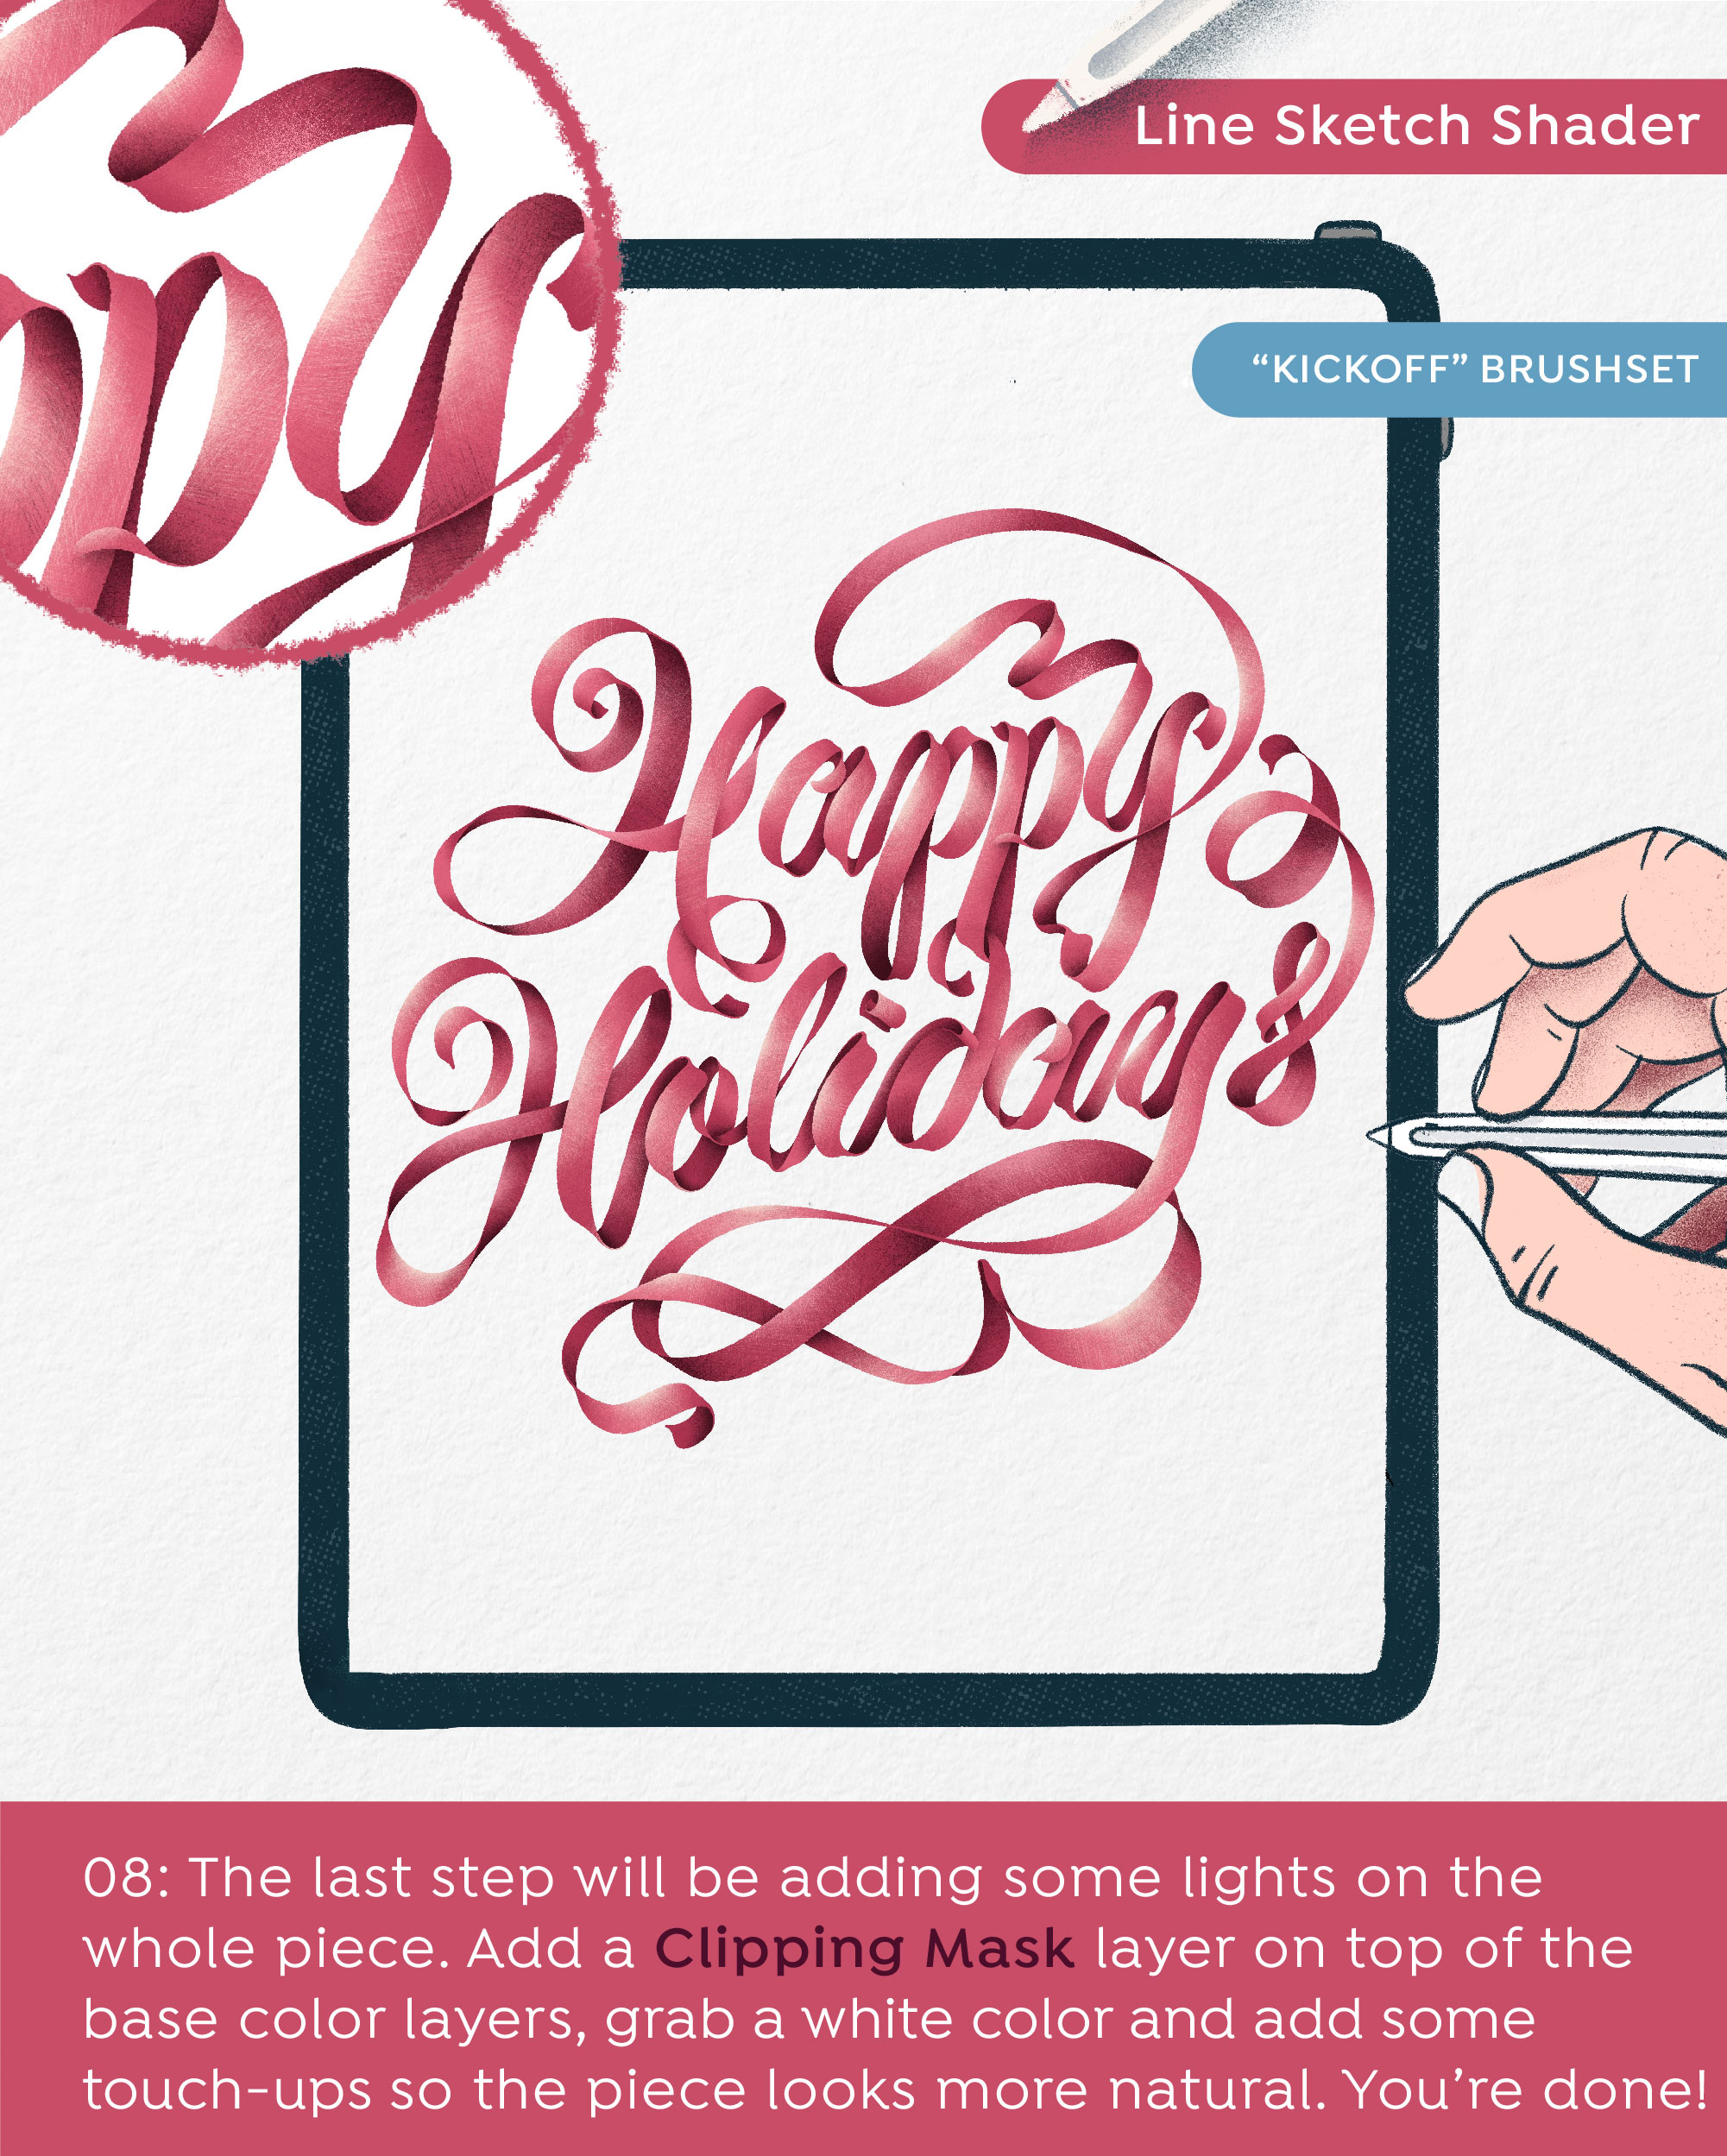
STEP 8:
Time for finishing touches! We are almost at the end, it wasn't so difficult, right? Just a little bit more, we promise! And then you will have a shiny little ribbon lettering ready to be shown to the world.
This step is similar to the last two. First you create a new layer on top of the layer with colour #01 and create a Clipping Mask again. Then choose a colour #04 and grab the same Shading Brush you used for the shading and add some lights on the ribbon. Don't forget to decide from where your light source is coming from. In this case light source is coming from upper left corner and, as you can see, all the lights are made in accordance to it.
And Voila! Your ribbon is done! We bet you are looking at some cool piece of lettering and we would love to see it, so hop on Instagram, post it and tag us :D
THE END!
We really hoped you enjoyed this and that you made some beautiful letters. You can always leave us a comment or reach to us on instagram if you want to leave a feedback or tell us if you would like to learn something particular. We would love to hep you out!
So yeah, have a sensational day and create create create!